Trinomial Cube
Contents
Age
3-6 yrs
Materials
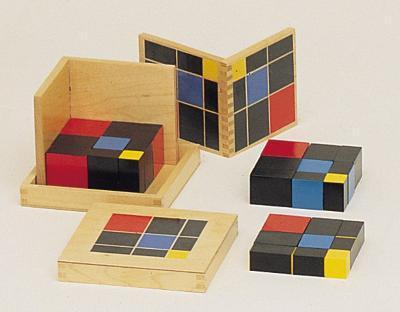
A box containing twenty seven wooden blocks:
- one red cube
- one blue cube
- one yellow cube
- six red and black prisms
- six blue and black prisms
- six yellow and black prisms
- six all black prisms.
When organized, these prisms form a cube that is contained in a box with two sides which open to expose the color pattern of the sides of the cube. The lid of the box has the color pattern contained on it.
Preparation
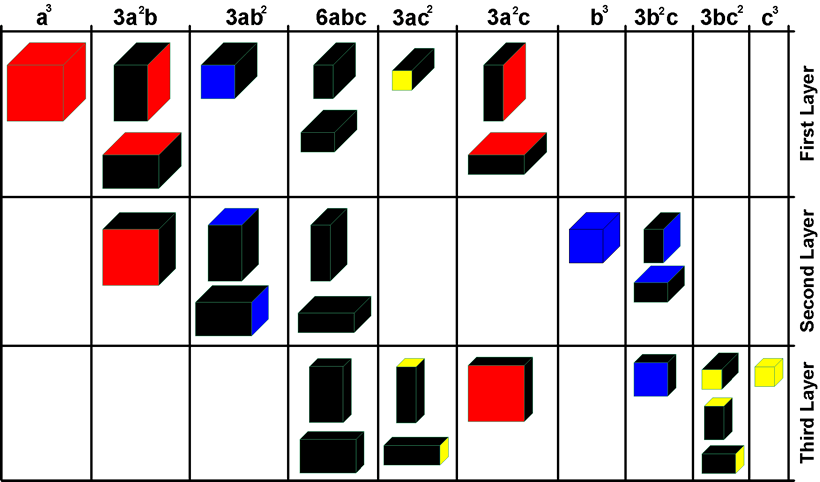
Algebraic expression: (a + b + c)3 = (a + b + c)(a + b + c)(a + b + c) = a3+3a2b+3ab2+6abc+3a2c+3ac2+b3+3b2c+3bc2+c3
The child takes the cube apart beginning with c3 and lays out the pieces as shown, according to the formula.
The child reconstructs the cube, matching red faces, black faces, and blue faces, beginning with a3.
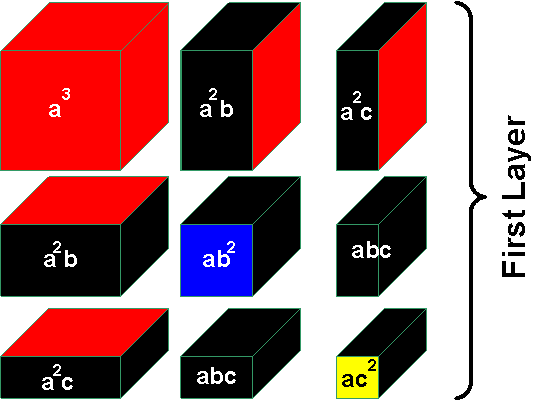
First Layer of the Binomial Cube: (represents a3+2a2b+ab2+2a2c+2abc+ac2)
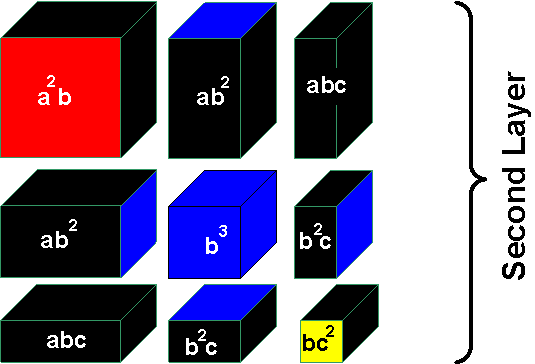
Second layer of the Trinomial Cube: (represents a2b+2ab2+2abc+b3+2b2c+bc2)
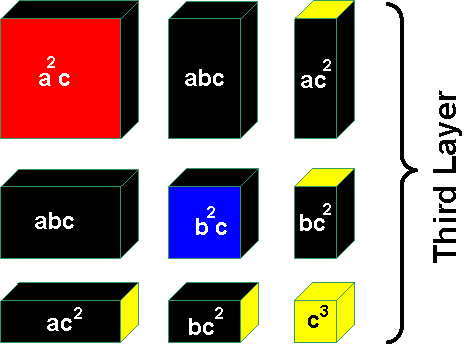
Third layer of the Trinomial Cube: (represents a2c+2abc+2ac2+b2c+2bc2+c3)
Presentation
- Invite the child to work with the 'trinomial cube'.
- Show the child where the trinomial cube is located on the shelf.
- When the child has made the selection of the material, begin with the third step after naming the material for the child.
- Indicate the procedure for carrying the material: Place one hand on each side of the box.
- Place the box on a table or rug in the upper left corner
- Remove the lid and place it by the box.
- Indicate the pattern on the lid and on the top of the cube of prisms.
- Say" I will build the cube on the lid."
- Open the two sides of the box.
- Indicate the pattern on the two sides and the top of the prisms.
- Remove the prisms from the box, beginning with the top layer.
- Begin at the right with the yellow cube, then to the next prism on the left which is yellow and black, and then the yellow and black prism to the left.
- Continue in the same order, moving from right to left removing all the prisms on the top layer and build the top layer lid.
- Remove the second and third layers of prisms in the same manner and build on the lid.
- Rebuild the cube in the box, beginning with the red cube and proceed from left to right as the bottom layer is built.
- Continue with the middle and top layers in the same manner.
- Indicate with the index finger the mapping of 'faces' of the same color.
- Upon completion, note the pattern of the sides and the top layer of the cube.
- Close up the two sides of the box.
- Replace the lid on the box.
- Return the material to the shelf in the manner described in #3.
Control Of Error
The prisms will fit in the box only if placed correctly.
Points Of Interest
Seeing the pattern on the lid, the top, and the sides of the cube. Seeing the binomial contained within the trinomial cube. Touching the colors which match and joining the prisms on identical sides.
Purpose
- Development of the visual sense of shape.
- Development of concentration, order, coordination, and independence.
- Development of an appreciation for beauty of form in three dimensions.
- Responds to the sensitive need for order in the child.
- Preparation of the algebraic concepts involved in the trinomial theorem.
Variation
- Proceed as in presentaion 1 through step #6. Build the layers outside the box without the lid.
- Proceed as in presentation 1 through step #6. Build the second layer to the right of the first layer. Build the third layer to the right of the second layer.
- Proceed as in presentation 1 through step #6. Remove the prisms and place them in three horizontal rows from right to left. Then replace the prisms in the box.
- Proceed as in presentation 1 through step #6. Remove the prisms and place them in a horizontal row, beginning with the yellow cube and proceeding left to right and back to front, organizing the prisms by shape. Replace the prisms.
- Place the emptied box at another table or rug. Rebuild the prism into the box, transfering the prisms one at a time.
- Using a blindfold replace the prisms in the box.
Links
Handouts/Attachments
